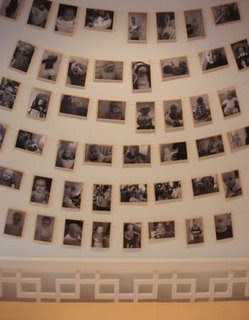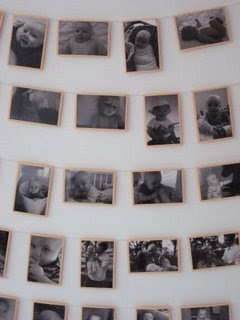

 I've gotten several requests for a photo garland how-to. It was definitely one of the easier things I did for the party (as opposed to baking a cake from scratch)!
Disclaimer: I have a Mac with the latest iphoto application...this made the process much, much easier for me. There are certainly other ways to go about doing the same thing, but these are the steps I took, based on the software that I have.
Step 1: Choose and edit photos. I created a new folder in iphoto and dragged my favorite photos from the past year into a folder I named '1st birthday.' I ended up with over 100 photos, and eventually was able to edit my selections to 48. I didn't worry about how many horizontals or verticals I ended up with.
Step 2: I converted all of my picks to black and white (a filter in the iphoto program). I chose to do this so the overall look would be more cohesive.
Step 3: I selected all photos and pressed 'order photos' in the iphoto application. This connects me directly online to a Kodak photo printing facility in California, where the photos are printed and then shipped directly to me. Note: all of the photos printed darker then I would have liked. If I were to do it again, I would have lightened the exposure on all of them before sending to print.
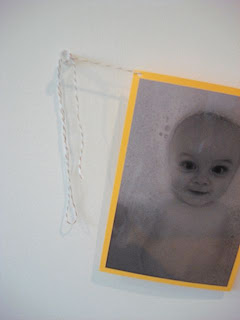
Step 4: We don't have a Paper Source in town, so I was left with Michael's as my only local choice. I found some golden yellow scrapbooking cardstock (in their scrapbooking section) that was cheap. The paper came in a pack of 50- 5 colors, 10 sheets of 8 1/2 x 11". I figured I would need 1 sheet for two 4x6 photos, which meant I needed to buy 5 packs to get 50 yellow sheets (again, I had a total of 48 photos). I threw in one extra pack just in case. They were on sale for $2/pack, so the cardstock was $12. Which I thought was pretty reasonable, since I now have 60 sheets of 4 other colors as well.
Step 5: I mounted the photos to the cardstock with double-stick tape. I didn't want to spray mount them, since I wanted to be able to use the photos for other purposes once the party was over. Make sure you use NON-removable double-stick tape. The removable kind enables the photos to fall off, and the non-removable is actually removable from the photos (just not the card stock).
Step 6: I used an exacto knife to trim a border around the photos. This process is made much easier if you have a cutting mat and metal ruler, as well. I gave each photo approximately a 1/4" inch border, but was not exact about it.
Step 7: I used an 1/8" inch hole punch (from Michael's), putting one hole in each top corner. I used Martha Stewart (from Michael's) yarn/string, in a white/brown color.
Step 8: Thread the string through the holes. I left a fair amount of extra string on both sides, so there would be room for adjustment.
Step 9: I hung the garlands from clear thumb tacks. With 48 photos, I chose to make 6 garlands with 8 photos each, putting them up in chronological order. I hung the bottom garland first, and worked my way up to the top...this made it easier to judge the distance I needed between each garland. Again, I was not exact, I just estimated how much room to put between them and made adjustments once they were up (hence, the extra string).
Garland, done!
I gave you more detail than was necessary- this really wasn't that complicated...but I figured more direction, rather than less, would be most helpful.
Have a great weekend!

This is a really fun idea, I love it! I'll be linking.
ReplyDeletethese are beautiful! great job.
ReplyDeleteis there a photo printer that you love?
ReplyDeleteSuch a great idea and final result! Thanks for sharing.
ReplyDelete離婚訴訟,離婚,外遇蒐證,徵信,女子徵信社,外遇蒐證,外遇蒐證,免費廣告,分類廣告,廣告刊登,私家偵探,偵探社,偵探社,徵信,徵信社,徵信,徵信社,徵信公司,徵信社,徵信社,徵信公司,徵信社,徵信公司,徵信,徵信公司,徵信評鑑,徵信網,徵信協會,徵信協會,徵信社,離婚,外遇,徵信社,徵信社,女人徵信,徵信,徵信,徵信,徵信,徵信社,徵信社,徵信公司,徵信社,徵信公司,婚姻諮詢,婚姻諮詢,離婚諮詢,離婚諮詢,離婚,討債公司,商業徵信,抓姦,尋人,徵信,外遇,徵信,徵信,外遇,尋人,徵信社,徵信社,徵信社,抓姦,抓姦,外遇,徵信社,外遇,外遇,台中徵信,台中徵信,台中徵信,台中徵信,台中徵信社,台中徵信社,台中徵信社,台中徵信社
ReplyDelete